TeamViewer on hyödyllinen ohjelma videokeskusteluille ja kaukosäätimille, ja se on melko suosittu valinta pelaajien ja etätietotekniikkapalvelujen keskuudessa. Monet käyttäjät ovat kuitenkin ilmoittaneet, että he eivät yksinkertaisesti pysty muodostamaan yhteyttä. He näkevät ongelmallisen virhesanoman ruudunsa alaosassa punaisen valon vieressä.

On olemassa melko monta tapaa, joilla voit ratkaista ongelman, ja suosittelemme, että tutustut niihin alla. Ne ovat yleensä melko helppoja suorittaa ja ne voivat ratkaista ongelmasi hetkessä!
Mikä aiheuttaa TeamViewer-virheen Ei ole valmis Tarkista yhteys -virheen Windowsissa?
Tällä erityisongelmalla on monia eri syitä, ja oikean löytäminen voi olla ratkaisevan tärkeää, jos et halua kokeilla kaikkia luettelossa olevia menetelmiä. Tämä opastaa sinut ratkaisuun nopeammin, ja siksi päätimme luoda luettelon kaikista mahdollisista syistä alla!
- Host-tiedoston virheelliset asetukset - Host-tiedosto sisältää tärkeitä tietoja Internetiin yhdistävistä sovelluksista, ja on mahdollista, että TeamViewerin merkintä vioittui. Sen poistaminen saa Windowsin luomaan sen uudelleen, joten yritä ratkaista ongelma.
- Virustentorjunta- tai palomuuriongelmat - Jos käyttämäsi palomuuri tai virustorjunta estää TeamViewerin pääsyn Internetiin, yritä tehdä poikkeus sen suoritettavasta päätiedostosta.
- DNS- ja Winsock-ongelmat - DNS-osoitteita voidaan muuttaa ja Winsock voidaan nollata. Monille käyttäjille tämä on kaikki ongelman ratkaisemiseksi, joten muista kokeilla sitä!
- IPv6-yhteys - TeamViewer ei yksinkertaisesti toimi IPv6: lla joskus, joten varmista, että harkitset sen poistamista käytöstä tämän ongelman ratkaisemiseksi. Se ei vahingoita, ja se voi tuoda TeamViewerin takaisin!
- TeamViewerin uusi käyttöliittymä - Käyttöliittymän ei pitäisi liittyä yhteysongelmiin, mutta se oli varmasti useiden TeamViewer-käyttäjien tapaus. Palauttaminen vanhaan käyttöliittymään onnistui ratkaisemaan ongelman heidän puolestaan.
Ratkaisu 1: Poista TeamViewer Hosts-tiedostosta
On erittäin todennäköistä, että TeamViewer-merkintä tietokoneesi 'hosts' -tiedostossa on vioittunut. Se saattaa näyttää osoitteita ja tietoja, jotka ovat täysin väärin, ja suosittelemme poistamaan sen merkinnät. Kun avaat sen uudelleen, merkintä luodaan uudelleen ja ongelma toivottavasti lakkaa näkymästä!
- Siirry kohtaan C >> Windows >> System32 >> Drivers >> Etc siirtymällä siihen File Explorerin avaamisen jälkeen. Ensimmäinen, valitse Tietokoneessa tai Oma tietokone vasemmalta ruudussa paikallistaa ja avaa Paikallinen levy C .
- Jos et näe Windows-kansiota, sinun on ehkä otettava käyttöön vaihtoehto, jonka avulla voit nähdä piilotetut tiedostot ja kansiot. Napsauta Näytä- välilehteä File Explorerin ylävalikossa ja napsauta Piilotetut kohteet -valintaruutua Näytä / piilota File Explorer näyttää piilotetut tiedostot ja muistaa tämän asetuksen, kunnes muutat sitä uudelleen.

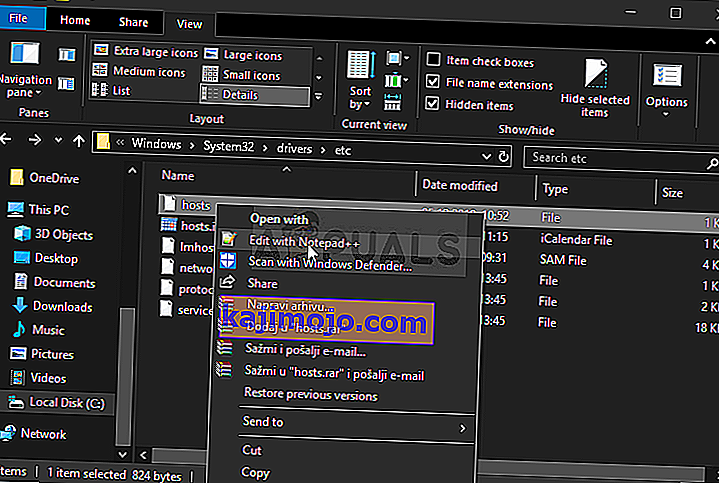
- Etsi hosts- tiedosto Etc- kansiosta, napsauta sitä hiiren kakkospainikkeella ja valitse Avaa Notepadilla . Käytä Ctrl + F-näppäinyhdistelmää ja varmista, että syötät 'teamviewer' Etsi- ruutuun, ennen kuin napsautat Etsi seuraavaa
- Etsi TeamViewer-osio tiedostosta. Sen pitäisi alkaa kirjaimella "#Teamviewer" ja varmista, että olet valinnut kaikki siihen kuuluvat, napsauta hiiren kakkospainikkeella valintaa ja valitse Poista-painike pikavalikosta.
- Tallenna muutokset napsauttamalla Tiedosto >> Tallenna tai käytä Ctrl + S-näppäinyhdistelmää . Sulje Muistio ja käynnistä tietokone uudelleen. Tarkista, jatkuuko ongelma TeamViewer “Ei valmis. Tarkista yhteys "-virhesanoma!
Ratkaisu 2: Vaihda DNS-osoitteesi
Käyttäjät ovat sanoneet, että he pystyivät ratkaisemaan ongelman yksinkertaisesti vaihtamalla Internet-palveluntarjoajasi tarjoaman DNS: n ja aloittamalla toisen käyttämisen. Se voi olla tietokoneen DNS, jossa ongelmaa ei näy, mutta monet käyttäjät yksinkertaisesti käyttivät Googlen DNS: ää ongelman ratkaisemiseen. Seuraa alla olevia ohjeita vaihtaaksesi DNS-osoitteen tietokoneellasi!
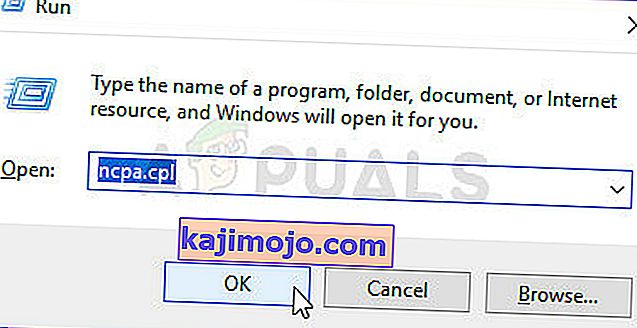
- Käytä Windows + R-näppäinyhdistelmää, jonka pitäisi avata Suorita- apuohjelma-ruutu, johon sinun pitäisi kirjoittaa tekstikenttään ' ncpa.cpl ' ja napsauttaa OK avataksesi Internet-yhteysasetukset- merkinnän Ohjauspaneelissa .
- Sama asia voidaan tehdä yksinkertaisesti avaamalla ohjauspaneeli manuaalisesti . Vaihda ikkunan oikeassa yläkulmassa näkymä vaihtoehdolla Luokka ja napsauta yläreunassa Verkko ja Internet . Napsauta Verkko- ja jakamiskeskus -painiketta avataksesi sen, ennen kuin voit etsiä vasemmanpuoleisen valikon Muuta sovittimen asetuksia -painikkeen ja napsauttaa sitä.
- Nyt kun Internet-yhteys-näyttö on auki millä tahansa yllä olevalla tavalla, kaksoisnapsauta aktiivista verkkosovitinta (sitä, jota käytät Internet-yhteyden muodostamiseen) ja napsauta alla olevaa Ominaisuudet- painiketta, jos sinulla on nykyisen käyttäjätilin järjestelmänvalvojan oikeudet.
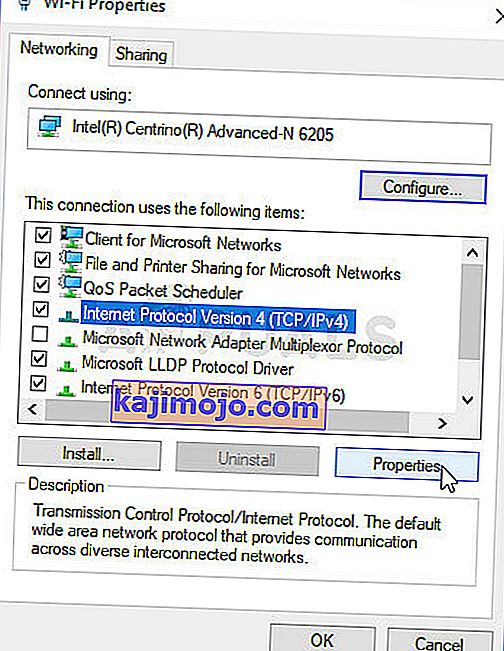
- Etsi luettelosta Internet Protocol Version 4 (TCP / IPv4) -kohde. Napsauta sitä valitaksesi sen ja napsauta alla olevaa Ominaisuudet- painiketta.
- Pysy Yleiset- välilehdessä ja vaihda Ominaisuudet- ikkunan valintanappi " Käytä seuraavia DNS-palvelimen osoitteita " -asetukseksi, jos se oli asetettu toiseen vaihtoehtoon.
- Kummassakin tapauksessa aseta Ensisijainen DNS-palvelin arvoksi 8.8.8.8 ja Vaihtoehtoinen DNS-palvelin arvoksi 8.8.4.4.
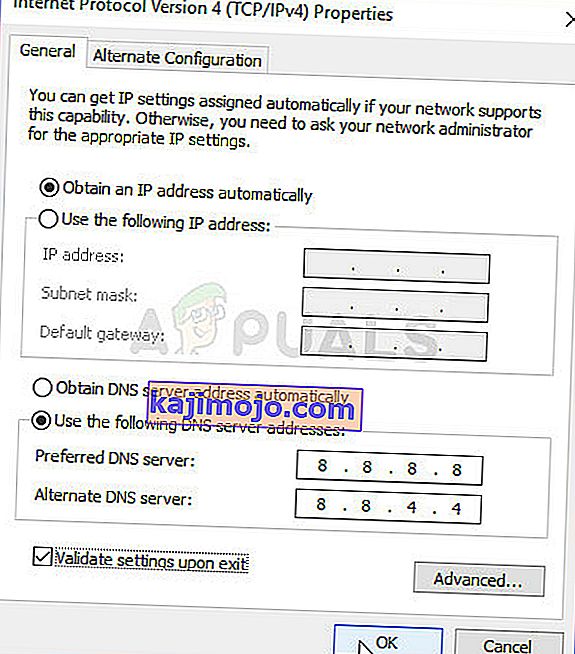
- Pidä " Vahvista asetukset poistuttaessa " -vaihtoehto valittuna ja napsauta OK, jos haluat ottaa muutokset käyttöön heti. Tarkista, onko TeamViewer “Ei valmis. Tarkista yhteys "-virheilmoitus näkyy edelleen tietokoneellasi!


Ratkaisu 3: Nollaa Winsock
“ Netsh Winsock reset ” on hyödyllinen komento, jota voit käyttää komentokehotteessa Winsock Catalogin palauttamiseksi takaisin oletusasetuksiin tai sen puhtaaseen tilaan. Voit kokeilla tätä tapaa, jos sinulla ei ole yhteyttä yhteyden muodostamiseen TeamViewerissa.
- Etsi " Komentokehote " kirjoittamalla se joko suoraan Käynnistä-valikkoon tai painamalla sen vieressä olevaa hakupainiketta. Napsauta hiiren kakkospainikkeella ensimmäistä merkintää, joka avautuu hakutuloksena, ja valitse " Suorita järjestelmänvalvojana " pikavalikkomerkintä.
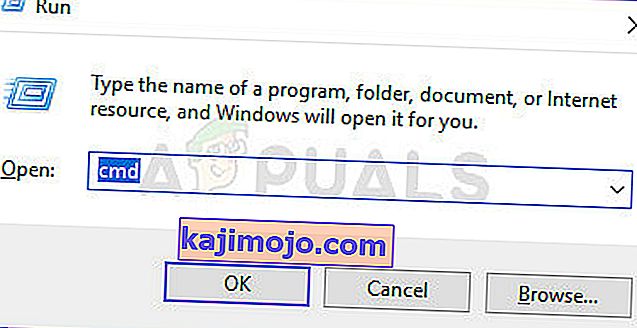
- Voit myös käyttää Windows-näppäin + R- näppäinyhdistelmää Suorita-valintaikkunan avaamiseen. Kirjoita avautuvaan valintaikkunaan ”cmd” ja suorita komentokehote Ctrl + Vaihto + Enter- näppäinyhdistelmällä järjestelmänvalvojan oikeuksilla.
- Kirjoita seuraavat komennot ikkunaan ja varmista, että painat Enter, kun olet kirjoittanut kaikki. Odota " Winsock-palautus onnistui onnistuneesti " -viestiä tai jotain vastaavaa, jotta tiedät, että menetelmä on toiminut etkä ole tehnyt virheitä kirjoittaessasi. Tarkista, jatkuuko ongelma.

netsh winsock reset netsh int ip reset

Ratkaisu 4: Älä käytä uutta käyttöliittymää
Käyttöliittymän ei pitäisi olla millään tavalla kytketty TeamViewerin Internet-yhteyteen, mutta kyllä oudolta, monet käyttäjät ovat ilmoittaneet, että he pystyivät ratkaisemaan ongelman yksinkertaisesti palaamalla ohjelman vanhaan suunnitteluun. Tämä voidaan tehdä TeamViewerin asetuksissa, joten varmista, että noudatat alla olevia ohjeita ja yritä ratkaista tämä yhteysongelma.
- Avaa TeamViewer kaksoisnapsauttamalla sen kuvaketta työpöydältä tai etsimällä sitä avattuasi Käynnistä-valikon ja napsauttamalla ylätulosta hiiren kakkospainikkeella.
- Napsauta aloitusnäytössä valikkorivin Ekstrat- painiketta ja valitse näkyviin tulevasta luettelosta Asetukset- merkintä.
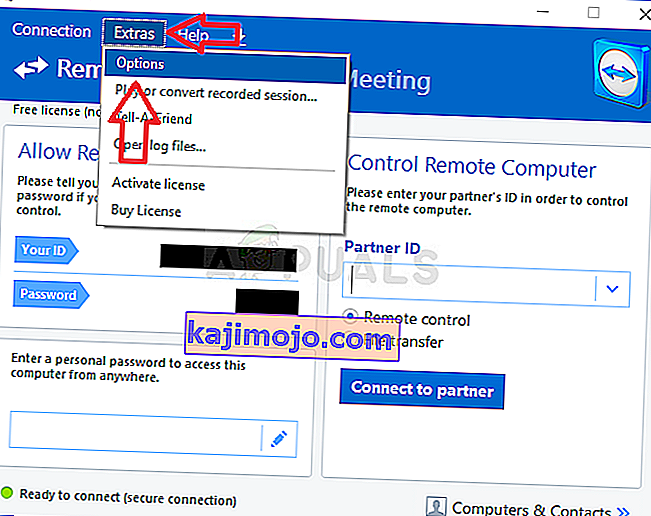
- Siirry siihen Lisäasetukset välilehteä TeamViewer vaihtoehtoja vasemman puolen navigointi-valikko ja tarkista alla Yleiset Lisäasetukset varten ” Käytä uuden käyttöliittymän ” vaihtoehto. Varmista, että poistat sen vieressä olevan valintaruudun valinnan, ennen kuin vahvistat tekemäsi muutokset.

- Avaa TeamViewer uudelleen ja tarkista, onko TeamViewer “Ei valmis. Tarkista yhteys "-virheilmoitus näkyy edelleen tietokoneellasi!


Ratkaisu 5: Lisää poikkeus Teamviewer_Service.exe-tiedostoon
Joskus virustentorjuntatyökalut eivät tunnista ohjelman pyrkimyksiä muodostaa Internet-yhteys vaarattomiksi, ja TeamViewerin ominaisuudet estävät sen. Jos haluat todistaa viruksentorjunnalle, että ohjelma on vaaraton, sinun on lisättävä se sen Poikkeukset / Poissulkemiset-luetteloon!
- Open the antivirus user interface by double-clicking on its icon at the system tray (right part of the taskbar at the bottom of the window) or by searching for it in the Start menu.
- The Exceptions or Exclusions setting is located in different spots concerning different antivirus tools. It can often be found simply without much hassle but here are some quick guides on how to find it in the most popular antivirus tools:
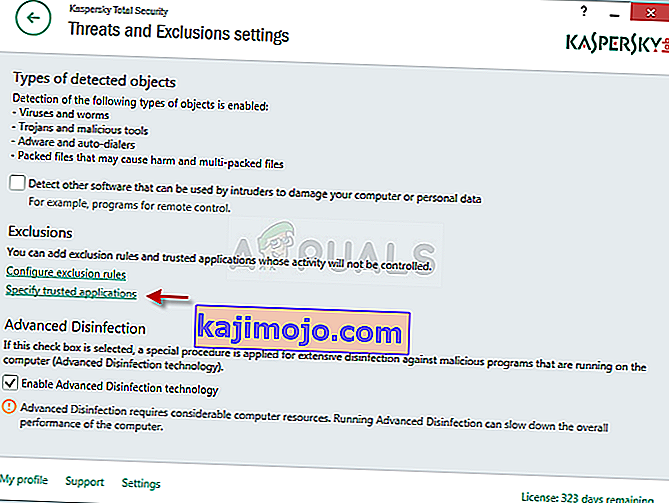
Kaspersky Internet Security: Home >> Settings >> Additional >> Threats and Exclusions >> Exclusions >> Specify Trusted Applications >> Add.
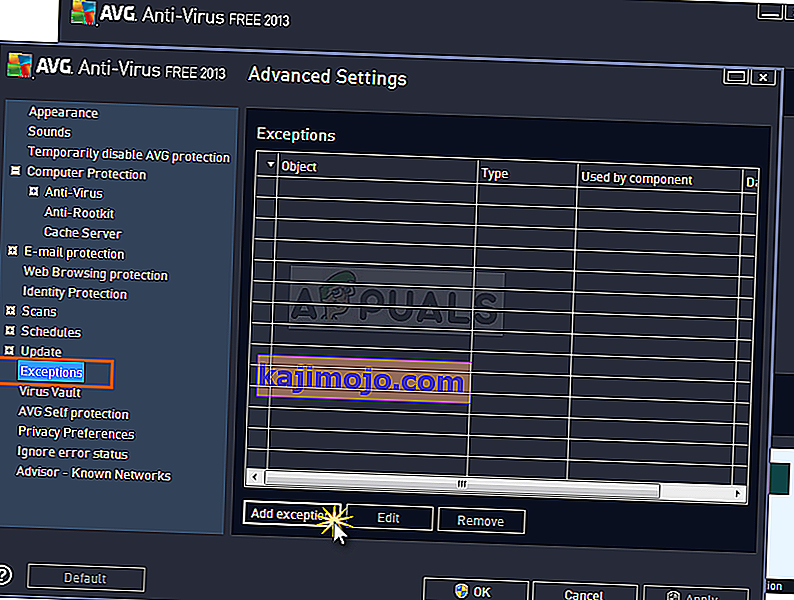
AVG: Home >> Settings >> Components >> Web Shield >> Exceptions.
Avast : Home >> Settings >> General >> Exclusions
- You will need to add the Teamviewer_Service.exe executable in the box which will appear prompting you to navigate to the folder. It should be in the same folder where you decided to install TeamViewer in. By default, it’s:
C:\Program Files (x86)\TeamViewer
- Check to see if you are now able to use TeamViewer without receiving the problematic error message. If it still won’t work, try restarting your computer and try again. The last step would be to uninstall the antivirus and try a different one if the problem persists.


Solution 6: Allow it in Windows Defender Firewall
For TeamViewer’s features to work properly, the app needs to have uninterrupted access to the Internet and its servers to work properly. Windows Defender Firewall is often to blame in such cases and we recommend you make an exception for the Teamviewer_Service.exe executable inside the Windows Defender Firewall!
- Open up Control Panel by searching for the utility in the Start button or by clicking the Search button or the Cortana button at the left part of your taskbar (bottom left part of your screen).
- After Control Panel opens, change the view to Large or Small icons and navigate to the bottom to open the Windows Defender Firewall option.
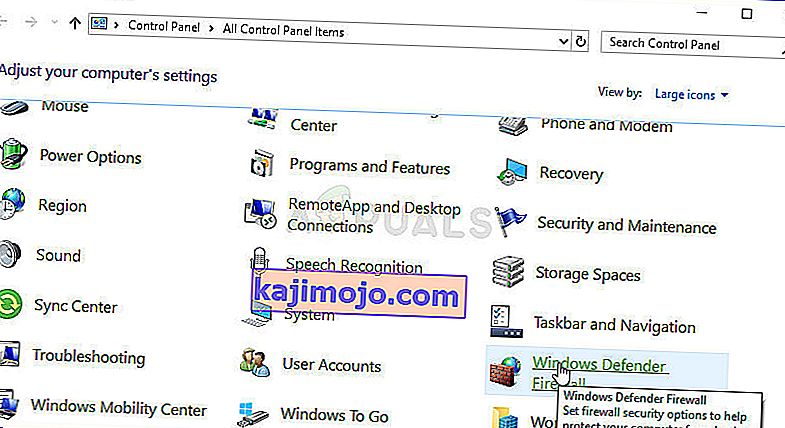
- Click on Windows Defender Firewall and click on the Allow an app or feature through Windows Firewall option from the left side list of options. A list of installed apps should open. Click the Change settings button at the top of the screen and provide administrator permissions. Try locating the executable inside. If it’s not there, click the Allow another app button below.

- Navigate to where you installed TeamViewer (C:\Program Files (x86)\TeamViewer by default) and choose the Teamviewer_Service.exe file.
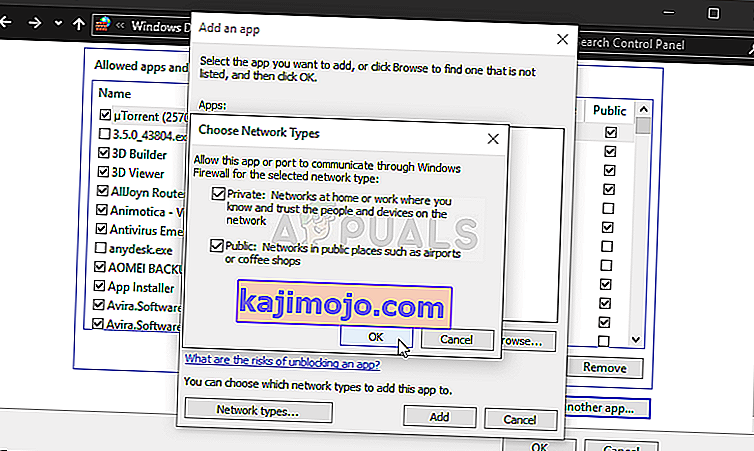
- After locating it, click the Network types button at the top and make sure you check the boxes next to both Private and Public entries before clicking OK >> Add.
- Click OK and restart your computer before checking whether the TeamViewer “Not ready. Check your connection” error message still appears on your computer.


Solution 7: Disable IPv6
Disabling Internet Protocol version 6 connectivity on your computer managed to resolve the problem for many users and it’s an easy way to resolve the problem. This makes this method worthy and you shouldn’t skip it during your troubleshooting process.
- Use the Windows + R key combo which should immediately open the Run dialog box where you should type ‘ncpa.cpl’ in the bar and click OK to open the Internet Connection settings item in Control Panel.
- The same process can also be done by manually opening the Control Panel. Switch the View by setting at the top right section of the window to Category and click on Network and Internet at the top. Click the Network and Sharing center button to open it. Try to locate the Change adapter settings button at the left menu and click on it.
- When the Internet Connection window opens, double-click on your active Network Adapter.
- Then click Properties and locate the Internet Protocol Version 6 entry on the list. Disable the checkbox next to this entry and click OK. Restart your computer to confirm the changes and check to see if the problem persists.


Solution 8: Restart the TeamViewer Service
Stopping the TeamViewer service from running will effectively restart the whole process and many users have reported that it only took them a few minutes to get TeamViewer to work again. Before starting, make sure you have closed TeamViewer completely.
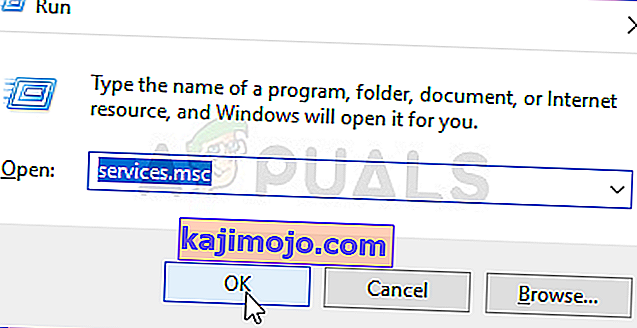
- Open the Run utility by using the Windows Key + R key combination on your keyboard (press these keys at the same time. Type “services.msc” in the newly opened box without the quotation marks and click OK to open the Services tool.
- The alternative way is to open the Control Panel by locating it in the Start menu. You can also search for it using the Start menu’s search button.
- After the Control Panel window opens, change the “View by” option at the top right part of the window to “Large Icons” and scroll down until you locate the Administrative Tools entry. Click on it and locate the Services shortcut at the bottom. Click on it to open it as well.
- Locate the TeamViewer Service on the list, right-click on it and select Properties from the context menu which appears.
- If the service is started (you can check that just next to the Service status message), you should stop it for now by clicking the Stop button in the middle of the window. If it is stopped, leave it stopped until we proceed.
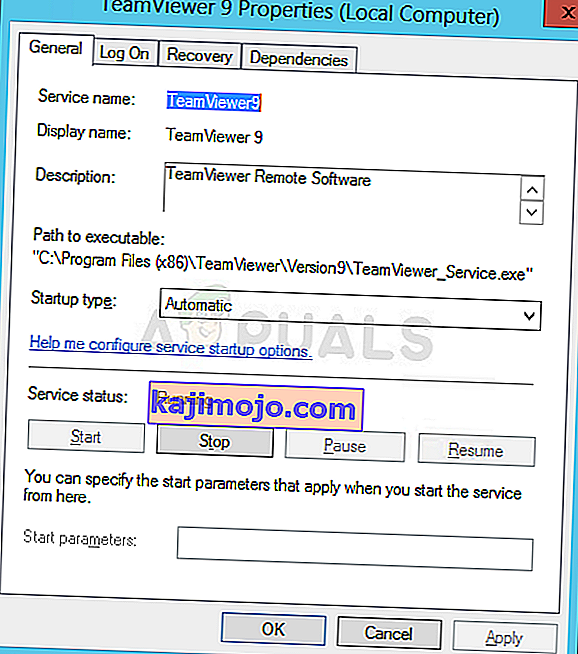
- Make sure that the option under the Startup type menu in the service’s properties window is set to Automatic before you proceed with other steps. Confirm any dialogue boxes which may appear when changing the startup type. Click on the Start button in the middle of the window before exiting.


Solution 9: Reinstall TeamViewer
If all methods above fail to work, reinstalling TeamViewer is the last method which can help you resolve the problem on your computer. It should be fast and painless if you follow all the steps properly! You will also install the latest version which contains the patch to the specific issue you are having!
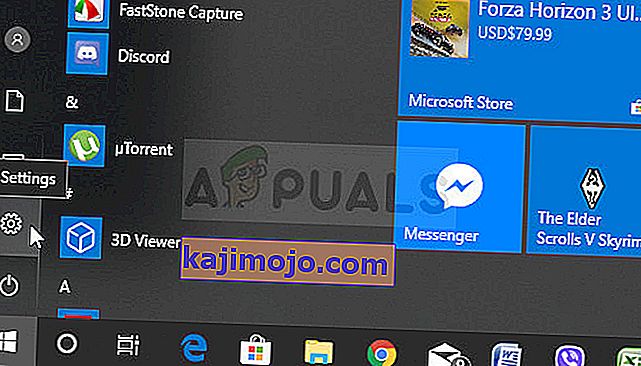
- Click the Start menu and open Control Panel by searching for it simply by typing with the Start menu window open. Alternatively, you can click the cog icon in the lower-left part of the Start menu to open the Settings app if you are using Windows 10.
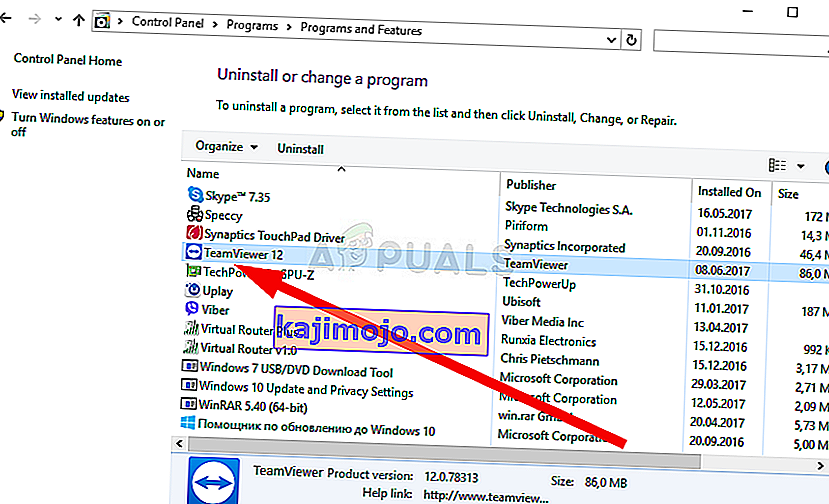
- In Control Panel, select the View as: Category option at the top right corner of the Control Panel window and click on Uninstall a Program under the Programs section.
- If you are using the Settings app, clicking on Apps should immediately open a list of all installed programs on your PC so wait for a while for it to load
- Locate TeamViewer in Control Panel or Settings and click on Uninstall/Repair. Follow any instructions which appear afterward to uninstall it completely.
- Download the latest version of TeamViewer by visiting this link. Download its setup file, run it from the Downloads folder, follow the instructions on screen, and check to see if the problem persists after reinstalling TeamViewer!

