Motorola introduced its mid-range G5 and G5 Plus phones earlier in 2017, and they are pretty awesome phones for the money. Unfortunately, Motorola locks the bootloaders on nearly all their devices, but savvy Android enthusiasts always find a way.
TWRP has not made an official release yet for this device, so this guide will utilize an unofficial TWRP 3.1.0.0, and root with Magisk instead of SuperSU. Many users confirm this method as working, so this guide will walk you through the necessary steps. Happy rooting!
Required Files:
Motorola USB Drivers for PC
no-verity-opt-encrypt-5.1
Magisk v11.6 | Mirror
TWRP Recovery
Minimal ADB and Fastboot (see “How to Install ADB on Windows”)
How to Unlock the Bootloader for Moto G5 and G5 Plus
Warning: Always remember that unlocking your bootloader will erase your user-data, so back up everything important before we begin.
- First we need to enable Developer Options on your phone. Go to Settings > About > tap “Build Number” 7 times. Now go into Developer Options and enable USB Debugging and OEM Unlocking.
- Now assuming you have already installed the Motorola USB drivers and ADB on your computer, open an ADB terminal (Shift + Right click inside the ADB folder and “Open Command Window Here”).
- Connect your phone to your PC via USB cable, and type into the ADB terminal:
adb reboot bootloader
- Now we need to make sure that ADB can communicate with the phone in fastboot mode, so type into the terminal:
fastboot devices
- You should see your phone’s serial number returned in the terminal prompt. If nothing appears, then try to re-install the USB drivers on your PC. But if your device is shown, type into the terminal:
fastboot oem get_unlock_data
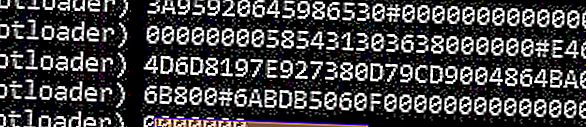
- Now the terminal should display a big string (like the screenshot). Copy the entire string with Right Click > Mark > highlight the string with Shift + mouse dragging to highlight, then copypaste into Notepad.
- Now we need to request an unlock key from Motorola. Go to the Motorola unlock request website, sign in with Google or Motorola ID, and paste the string from earlier into the text field. Now click “Can my device be unlocked?”
- You’ll get a “Request Unlock Key” button, so check “I Agree” and hit the request button. You will be emailed your unlock key. Once you have the unlock key, go back into the ADB terminal and type:
fastboot oem unlock xxxxxx
^Replace xxxxx with your unlock key.
- Your bootloader will be unlocked, and your phone will be formatted during the process.

How to Install TWRP on Moto G5 and G5 Plus
- Since the phone was formatted during bootloader unlocking process, you need to re-enable USB Debugging and OEM Unlocking from the Developer Options. So remove your phone from your PC and do that, then connect the phone to your PC again.
- Reboot the device into bootloader mode once again (remember: “adb reboot bootloader”).
- Now assuming you downloaded the TWRP file from above and saved it on your desktop, it’s time to flash it to your phone. Move the TWRP file into your main ADB folder (where you right-clicked and opened the terminal earlier), and type into the terminal:
fastboot flash recovery xxxxxxx.zip
^Replace xxxxx with the filename, e.g. twrp_cedric.zip for G5 and twrp_potter.zip for G5 Plus.
- Now, when it’s done flashing, do not reboot your device using the power button. Reboot directly into TWRP recovery using ADB command:
fastboot boot recovery.img
- So once you’re in TWRP, go to the Decrypt/Data screen, hit Cancel, and “Swipe to Allow Modifications” when prompted. Now go to Wipe, and then “Swipe to Factory Reset”.
- Now to go TWRP main menu and press Reboot, then reboot to Recovery. Do not install SuperSU if asked.
- Your phone will reboot back into TWRP, so now we can begin the rooting process.
How to Root the Moto G5 and G5 Plus
- From inside TWRP, go to Mount and choose MTP. Copy the “no-verity-opt-encrypt-5.1.zip” and “Magisk-v11.6.zip” to your phone’s storage.
- Now go back to TWRP main menu and choose Install. Select the no-verity-opt-encrypt file and swipe to flash it, then Reboot to System when it’s done.
- After your phone is done rebooting, boot it again into TWRP recovery, and flash the Magisk .zip using the same procedure, then reboot into the system once again.
- Once you’re in the Android system, open the Magisk app and update it to the latest version when prompted. That’s it!